Indesign pdf-ohje
InDesign Guide: Bleed (3 mm) and Print-Ready PDF
When you add a 3 mm bleed and export the file correctly as a PDF, your print will be trimmed cleanly without unwanted white edges.
Bleed 3 mmBackground beyond the edgePDF Print + Marks & Bleeds
Quick idea: Bleed is an “extra edge” that won’t remain visible, but it ensures a clean trim. Text and logos should always stay inside the safe area.
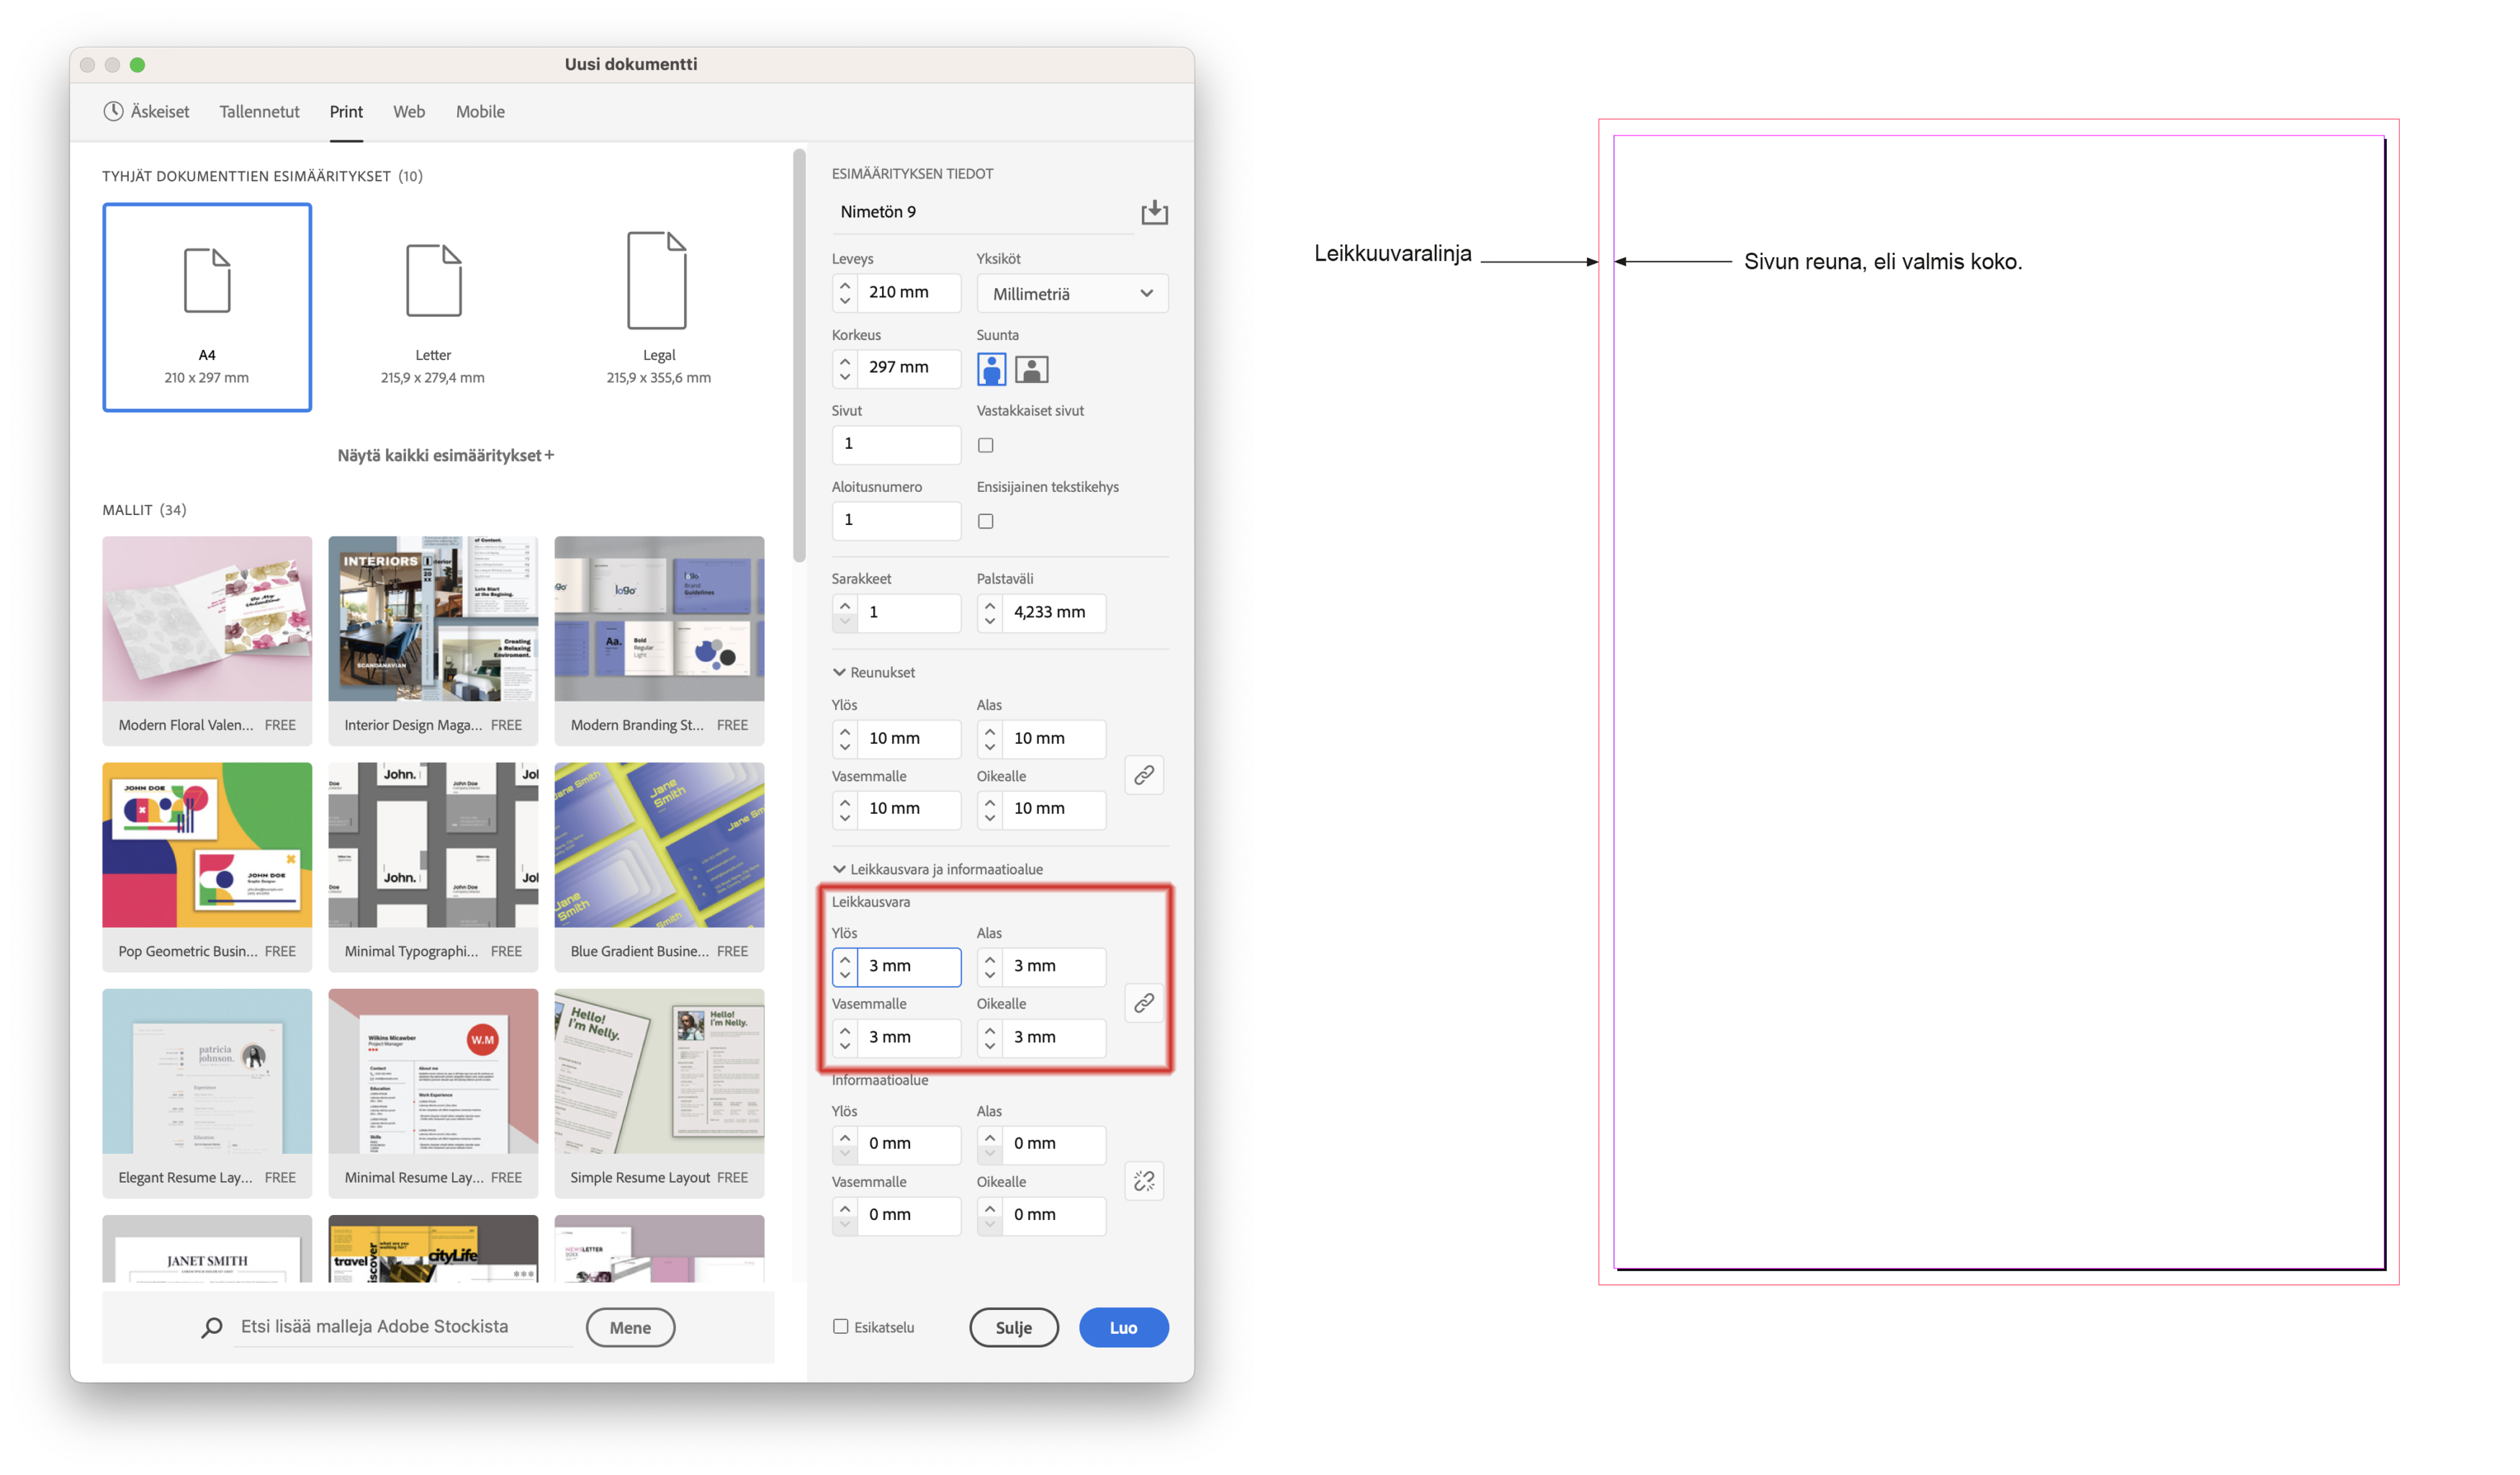
1) New document: set bleed from the start
Path in InDesign
File → New → Document → Bleed
- Set Bleed: 3 mm (Top/Bottom/Inside/Outside)
- If the chain icon is active, one value is enough
- Keep important content at least 4–6 mm away from the trim line
How do you see the bleed area?
- The bleed is shown outside the page as a red line
- Extend background colors and images up to (and beyond) the red line
- Keep text and logos clearly inside the safe zone
2) Existing document: add bleed afterwards
File → Document Setup → Bleed
- Set 3 mm on all sides
- Finally, check that backgrounds/images extend into the bleed area
Remember: Only background colors or images belong in the bleed area.
Do not place text, logos, or important elements inside the bleed.
Do not place text, logos, or important elements inside the bleed.
3) Export a print-ready PDF (recommended)
File → Export → Adobe PDF (Print)
| Setting | Recommendation | Why? |
|---|---|---|
| PDF preset | PDF/X-1a or High Quality Print | A reliable standard for printing |
| Marks | Enable Trim Marks | Shows where the product will be cut |
| Offset | 3 mm (2–3 mm is fine) | Keeps marks safely away from the design |
| Bleed | Use Document Bleed Settings | Ensures the 3 mm bleed is included in the PDF |
| Pages | Pages (not Spreads) | Print files must be delivered as single pages |
4) Quick check before sending
- Open the PDF and confirm the bleed is visible (background continues past trim)
- Make sure pages are separate (not spreads)
- Zoom to 200–300% and check text/logos remain sharp
Next step
Once your PDF is ready, you can order your print products easily online. If anything feels unclear, we’re happy to help before printing.
Tip: If your background reaches the edge, bleed is essentially required.